Lync Web for Online Meetings

lync2013.png

Lync Web App is an instant messaging and audio/video chat tool. It’s a great option for online meetings, ad hoc conversations, advising and tutoring. Lync Web includes text-based instant messages, audio and video chat, the ability to share Powerpoint presentations or even your desktop to demo applications or processes. There’s also a whiteboard for quick collaboration and a polling tool for rapid feedback in larger groups.

It’s easy to get started with Lync Web. It runs entirely in your web browser and you only need to install a quick plugin to start your first session. Lync can be accessed using the same login and password as your Lesley email.

Having trouble finding time to meet with your colleagues? Why not schedule your meetings virtually? You can do this directly in Outlook or the Outlook Web App, just as you would any other type of meeting. Select the “Online Meeting” options and a link to the Lync meeting will be included in your invitation. Need to meet with someone who isn’t part of the Lesley community or want to invite a guest to your class discussion? No problem. Include their email address in the meeting invite and they will receive guest access to the online meeting. Note: Guests have slightly fewer privileges for presenting, but will be able to fully participate in the discussion and access the whiteboard.

Lync allows you to participate in online meetings in a variety of ways. There is a desktop client for both Windows and Mac and mobile clients for Windows, Android and iOS so you can even stay connected when you aren’t at your desk.

You can find more information on how to get started with Lync at support.lesley.edu.

Not sure if Lync is right for you and want to consider other options? Check out the Comparison of Online Meeting Tools for a quick overview.

Teaching Body Movement Online with Kaltura Video

Nancy Beardall teaches Body/Movement Observation and Assessment for the Expressive Therapies program. This September, she taught the course in a fully online format for the first time. Initially, Nancy couldn’t imagine how she could successfully support students learning body, effort, space, and shape at a distance. Enter Kaltura, a video recording and sharing software that is integrated directly into myLesley.

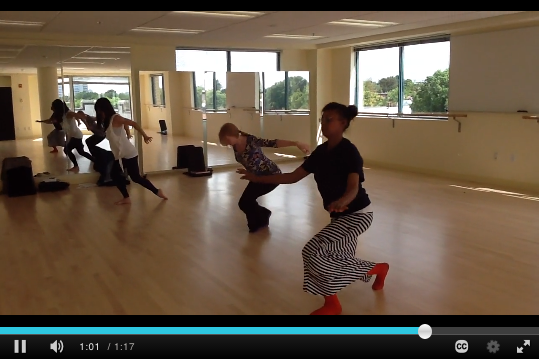
Nancy’s students were required to observe and practice the fundamentals of body movement, but they were only going to be on campus for a few weeks during their summer residency. Nancy’s solution was to record her on campus students performing the body fundamental exercises and then uploaded these videos to her online course using the Kaltura Media Gallery. The online students could then review the videos as often as they needed, comment on what they observed in their assignments and discussions, and then practice the movements on their own. If students had questions, Nancy could refer them to the videos and even reference specific moments or clips within the movies.

body fundamentals video screenshot

The Kaltura videos worked so well that Nancy’s on campus students wanted to use it as well. The videos provided them with an easy way to review and practice their observation skills outside of class. They also uploaded selected dance project videos to Kaltura to share with their classmates for feedback.

Nancy has nothing but good things to say about Kaltura. She refers to it now as a “lifesaver” for her online course. She and her students also found it much more accessible and less cumbersome than previous software tools they had used to share video. Considering that Nancy didn’t get access to Kaltura until three days before the start of her course, and needed to get both herself and her students comfortable with the tool, this is high praise for its ease of use.

So what are you waiting for? Contact eLIS and start using Kaltura Video in your online or face-to-face courses today.

New Blackboard Feature – “Video Everywhere”

Now it’s easier than ever to put YOU in your course.

  • Want a quick and easy way to record and embed a short video introduction of yourself in your course?
  • Looking for a simple way to provide video feedback for your students?
  • Thinking about a way to record and post a short video demo?
  • Hoping to repurpose a video from your YouTube channel and add it right into your course in seconds?

You can do all of those things right in Blackboard with Video Everywhere!

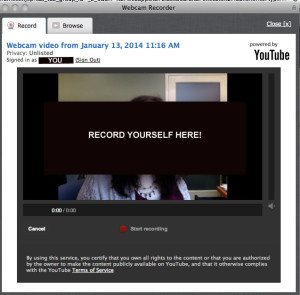
VE RECORD IMAGE

Video Everywhere is a new feature in Blackboard that lets you record with your computer’s webcam, upload the video right to your YouTube account, and embed it into your course – all at the same time and all without leaving the Blackboard environment. If you already have a video in your YouTube channel that you’d like to quickly insert in your course, you can use Video Everywhere for that too!

Got a computer, a webcam, a Google account, and a YouTube Channel? You’re good to go!

Getting Started
When you choose to add an item to your course, you’ll find the “Video Everywhere” icon in the Content Editor. It looks like a small webcam:

 video_everywhere_icon

You can find the icon located in the lower left-hand corner of the content editor:

VE_Location

When the “Record” window opens, just sign into your Google/YouTube account (you’ll need to create a Google account if you don’t have one already and you’ll need a YouTube channel if you don’t have one yet.).

step3

Note that the default is the Record screen but you can choose the Browse tab to insert a video you already have in your YouTube channel.

Once you sign in, you’ll be walked through the process to easily Record, Upload and Insert your video right into your course. Just grant access when asked along the way.

Once it’s in your YouTube channel, the video will be available to insert in any of your other courses using Video Everywhere’s Browse option from within each course.

That’s all there is to it!

A word about privacy: Please be aware that any video recorded with Video Everywhere will go directly to your YouTube account and have a default privacy status of “unlisted”. This means that it can only be viewed by those who have the URL for the video, and it won’t come up in a search, but the status is NOT “private”.  More information about this is available on Blackboard’s Video Everywhere Support site (see link below).

For More Information
You can find a step-by-step guide to using Video Everywhere here: Blackboard’s Video Everywhere Support Page, including information about privacy issues and making videos accessible.

You can also view Blackboard’s quick video introduction.

For more help with this new feature, contact elis@lesley.edu.

Advice for Your First Web Conference

to_do
Advice for your first web conference
The first time your class meets virtually can be daunting. If you’re not practiced at web conferencing, it may feel awkward and foreign. You probably felt pretty nervous the first time you walked in front of a classroom of students, too. Here are a few tips to turn you into a web conferencing pro:

Create a sketch of the session
List your main goals and how you hope to accomplish them. Create an outline or “storyboard” of your session. Consider what features of the web conferencing software you will use and make note of any additional resources you will need such as links to websites, images, etc.

Keep it simple
Don’t try to use everything. You don’t need to use every tool in the software. Pick a few key ones and then focus on the content and communication. You don’t want your meeting to be about the tool. Don’t try to do too much in one session. If it’s your first online class meeting, your students may need to adjust to a different way of interacting. Keep your main goal in mind.

Include interaction
You may not be in the same room with your participants, but you can still interact with them. Consider including an icebreaker activity at the beginning of the session. If the group is small, give everyone a chance to introduce themselves. Ask them questions. If there’s a polling tool or emoticons, use it to get quick feedback. Avoid too much text and use graphics that work with your content.

Managing participation
Plan in advance how you will manage questions or comments from participants. Is there a “Raise Hand“ to request the microphone or get your attention? Will they type in the chat window? Send you a private chat message? Let participants know how they are expected to participate at the outset of the session. Being clear will help ease any confusion.

Practice, Practice, Practice
Do a dry run of your session using all the tools you will use in the real session. Treat it like a dress rehearsal. Invite a friend or colleague to be your “student.” The more comfortable you are with the virtual space and its tools, the less you have to think about them. This allows you to focus on your students and the presentation material.

Self-evaluate
Do a little self-reflection after the session. What worked? What didn’t? Why? What might you want to do differently next time? It’s easy to skip this important step, but don’t. Review while the session is still fresh in your mind.