An LMS Review at Lesley

The Digital Experience Committee and Teaching and Learning with Technology (TLTech) Committee are currently conducting an LMS Review. Lesley University has been using Blackboard as our learning management system (LMS) since 2005. During this time LMS’s and elearning have changed dramatically. In July 2015, Blackboard released a brand new version of its LMS called Blackboard Ultra. Blackboard Ultra is a major redesign compared to the current version of Blackboard. Since moving to this version would be such a big change, it seemed worthwhile to revisit the LMS market to determine if another LMS would better fit the needs of Lesley University and its faculty and students.

How We Use the LMS (Blackboard):
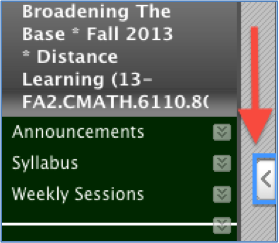
Lesley uses the LMS as the primary classroom venue for fully online courses and to enhance face-to-face courses, allowing for students to submit assignments, collaborate together outside of class, and to bring outside resources into the classroom.

The LMS Options Currently Under Review:
The Digital Experience Committee scheduled demos with:

The review committee also looked at Haiku and decided to eliminate them from further consideration after the initial vendor demo. Pearson and MoodleRooms were also given brief consideration, but demos were not scheduled with these vendors as they did not seem to fit our needs.

Blackboard Ultra is not yet ready for us to do a full review of its platform. We are, therefore, reviewing Blackboard’s Software as a Service (SaaS) options. This would allow us to keep our current version of Blackboard/myLesley while moving to a cloud-based model that would allow for continuous maintenance with little to no downtime for upgrades.

After reviewing detailed descriptions of each of the Learning Management Systems in the TL Tech committee, a smaller subcommittee of faculty was selected to decide which vendors should provide demonstrations to the entire campus. This faculty subcommitee is currently reviewing and testing these options. We are also in the process of scheduling on-campus vendor-led demos of the systems of most interest to faculty. Keep an eye on this blog and announcements from Faculty Development at Lesley for dates and opportunities to participate. Contact elis@lesley.edu with questions and comments.

Track Student Performance for Early Outreach

Once upon a time, Blackboard had an Early Warning System to alert you about students who might need outreach or additional assistance. It was a good idea, but it was clunky, awkward to navigate and hidden away. Therefore, no one used it.

The Early Warning System has now grown up and evolved into the much easier to use Retention Center.
retention center alert

The Retention Center allows you get an at-a-glance view of how your students are doing. Alerts tell you if students haven’t logged in to the course recently, aren’t participating in course activities, have missed due dates or have grades below a certain threshold. You can easily navigate through multiple courses to get an overview or click for more details on a specific course.

You can choose to monitor at-risk students and contact them directly from the Retention Center. The Retention Center will keep track of your notification emails and any private notes about the student such as special accommodations for disabilities, additional assistance provided or extenuating circumstances. You can also set up custom alerts or edit the existing default alerts for a course. Only instructors and teaching assistants can see Retention Center information in myLesley.

Retention Center main page

Start using the Retention Center now! There is no setup required.

You can access the Retention Center in two ways: the My Blackboard menu in the top right corner of your window or from the Evaluation area of your course’s Control Panel.

Screen Shot 2015-10-06 at 3.16.45 PM

To learn more about how to use the Retention Center and its robust features, check out the Using the Retention Center tutorial.


myLesley Blogs, Journals & Wikis, Oh My!

Did you know that myLesley has its own built-in set of blogs, journals and wikis? They’ve been around for a while, but with the latest myLesley update now is a great time to take another look.

Blackboard blog

What’s so great about Blackboard blogs and wikis?

Faculty who have already switched over to these built-in tools have found them to be far easier to use and set up. This is especially true if you create individual blogs for your students. Now there’s no need to manually set up a separate blog for each student. Just create your blog, click a single button (Individual to All Students) and Blackboard will automatically take care of the rest. Note: If you select the Course option all of the students will post their entries to a shared single blog.

individual blog setting

Blackboard blogs, journals and wikis have the same text editor as the discussion board so your students do not need to learn a new tool. Adding images and media is far more straightforward and obvious and because theses tools are native to the Blackboard environment, they have access to all the Blackboard tools. This includes the ability to easily add and/or record video with Video Everywhere, recording audio with Voice Authoring and integration with the Grade Center.

What you need to know?

All Blackboard blogs, journals and wikis are private to your course and can only be accessed and viewed while you and your students are logged into myLesley. This set-up fully complies with FERPA regulations. This privacy feature also means that you cannot copy blog or wiki content to another course.

If you have created a template for a wiki assignment, we recommend that you set it up in another course, such as a development shell or your myspace (aka Faculty Demo Student Account). You can then manually copy and paste the pages of the wiki into your new course. You could also create a Word document with the structure of each page and save it with your other course resources. This may seem a little more cumbersome than simply copying the wiki from course to course, but it’s easier than having to delete all the pages and student comments from last semester’s wiki assignments in order to start with a clean template.

Where to find out more info?

Please review the support pages below for more info on how to set up the tools, create and edit content, and grade student work.

Blackboard Wikis
Blackboard Blogs and Journals

What to Look Forward to in Blackboard for Fall 2014

On August 26, 2014, myLesley will be upgraded to the latest version of Blackboard (Blackboard Learn 9.1 April 2014). This scheduled myLesley upgrade will resolve known issues and include several new features and enhancements that are especially useful for faculty. They include:

Student Preview – Quickly View Your Course as a Student
Toggling the new Student Preview button provides instructors with the capability to see and experience their myLesley courses exactly as their class does. While in Student Preview mode, instructors can perform the following student activities: submit assignments, take tests, create blog posts, create journal and wiki entries and view traditional student only tools, such as My Grades. For more information, review the Details or watch the Overview Video below.

SafeAssign
SafeAssign, the tool that reviews assignment submissions for plagiarism, is now integrated as an option right in the Assignments tool and also includes a suite of new reporting features. For more information, review these Details.

Atomic Learning
Atomic Learning is a free service available to all Lesley students and faculty. Atomic Learning features hundreds of self-paced video tutorials on popular software tools and online resources. You can now add these tutorials directly to your myLesley course for students to review without needing to login to a different site. See our Atomic Learning tutorial for more information.

Achievements Tool
The Achievements tool allows instructors to define criteria for issuing rewards to students in the form of both Badges and Certificates. Students can see which rewards they’ve earned and what’s required of them to receive additional rewards, providing insight into learning progression toward defined competencies. For more information, review the Details or watch the Overview Video below.

Anonymous Grading
Instructors can hide student names from submitted assignments for anonymous grading. Review the Details for more information.

How to Make Printable Versions of Your Weekly Sessions in Blackboard

It is possible to make printable versions of your weekly sessions or modules for your students in Blackboard whether or not your materials are organized in folders or in learning modules.

chromeTo begin, you’ll need to log into your course using the Chrome browser. If you don’t already have Chrome installed on your computer you can download it here. Please note that Firefox is still the browser we recommend that you use for Blackboard activities but the Chrome browser appears to be the only program that allows us to create printable copies of Blackboard screens.

1. Once you’ve logged into your course via the Chrome browser make sure the Edit button is toggled to the “On” position.

2. On your sidebar locate the menu item where your course materials are housed. For example, you may have an item titled “Course Modules or Course Sessions.” Right click on this link. A menu will open. Select the “Open in New Tab” option.

open_new_tab

3. At the top of your browser you’ll now see 2 separate tabs. Click on the item that is labeled with the same title as the menu item that houses your course materials. In this instance we’ll click on the tab called “Course Sessions.”

session_tab
4. On the screen you’ll now see a list of the sessions or modules that appear in your course. Right click on the week you would like to make a printable for and once again click on the “Open in New Tab” option from the menu that appears.

item4print
5.  At the top of your browser you’ll now see 3 separate tabs. Click on the item that is labeled with the same title as the session or module that you’d like to create a printable version. In this instance we’ll click on the tab called “Week One: Getting Your….”

item5print
6. You’ll now see all of the content items for the week you selected in your browser window. At this point we recommend that you minimize any sidebar menus (located on the left hand side of the page) that appear in your course.

If you’re using Learning Modules with a Table of Contents you can minimize the table by clicking on the icon indicated below:

toc
To minimize your main course menu (or sidebar) click on the arrow icon.

minimize

7. Now, at the top of your screen, locate the menu item called “File.” Click on this item. A menu will open. Select the “Print” option from the menu.

step7

8. In the print menu window click on the “Change” button located in the Destination area.

step8
9. In the new window that appears, locate the Local Destination section and click on the “Save as PDF” option.

step9

10. A new menu will appear. A preview of your course session will be located on the right hand side of the page. Click on the Save button found on the upper left hand side of the window.

step10

11. The Save As window will open. Here you can rename the file and select the location on your computer that you would like to house the document you’ve created. When you’ve made your edits and/or selections click the “Save” button.

step11
 12. Now you can upload this printable version of your content to the class or email it directly to students. Please contact elis@lesley.edu if you need additional assistance. You can also print these instructions.