Pump Up Your Pedagogy Week

Kick off the spring semester with three days of training and faculty development workshops sponsored by the Center for Teaching, Learning and Scholarship, eLearning and Instructional Support, Information Technology, Lesley Libraries, Office of Grants and Research, Office of the Provost and The Creativity Commons.


PUMP UP YOUR PEDAGOGY – January 19, 2016

  • “Snow Day Toolkit”: Designing a Blended Experience
  • Powerful & Pertinent Online Discussions
  • Collaborating in the Cloud (OneDrive/ 365)
  • Skype for Business vs Blackboard Collaborate for real-time connection

PUMP UP YOUR PEDAGOGY—January 20, 2016

  • Kaltura Bootcamp: Video Sharing in Your Classroom
  • Peer Review in Voicethread Webinar (VoiceThread trainer)
  • Bring Your Own Lunch and Strategies for Finding Grant Resources — Creativity Commons
  • Popcorn & A Movie: Library Video Databases
  • The Mobile Constructivist Classroom (Ian Camera, Apple Rep.)
  • Appy Hour: Wine, cheese, & mobile applications

FACULTY DEVELOPMENT DAY—January 21, 2016
If it is happening to you, it is happening to me; it is all about inclusivity.
A day of workshops including but not limited to the following:

  • Infusing inclusion and diversity into course syllabi
  • A case based workshop with Counseling and Disability Services focused on classrooms issues related to disability and mental health
  • Humanizing the online learning environment, related to difficult discussions based on race, gender and sexuality

Detailed daily schedules will be coming soon.


12 Days of Learning: Designing Presentations

Atomic Learning has created the 12 Days of Learning, a series of articles designed to kick off resolutions to keep learning in the new year. We thought this was a great idea and have decided borrow (shamelessly steal) it and do our own. Day 8’s resource focuses on improving your presentation design.

We’ve all sat through boring, tedious presentations with too much text in too small of a font that we couldn’t read from our seats. So much so, that “Death by Powerpoint” is a thing.

Don’t do that. Instead, review these Atomic Learning tutorials on Effective Presentation Design below.


Effective Presentation Design

A. Presentations: What You Need to Know 

B. Getting Started

C. Communicating

D. Telling the Story

E. Getting Ready for Delivery

F. Resources


12 Days of Learning: VoiceThread Doodler

Atomic Learning has created the 12 Days of Learning, a series of articles designed to kick off resolutions to keep learning in the new year. We thought this was a great idea and have decided borrow (shamelessly steal) it and do our own. For our Day 4 post, let’s look at VoiceThread and the Doodler tool.

The Doodler tool in VoiceThread allows you to annotate your image or slide in VoiceThread using your mouse (or finger if you’re using a mobile device) to draw on the presentation area. It’s as if you had a pointer to direct the viewer’s attention to a specific area of the slide. All doodles will play back in time to your recorded voice so you can describe the detail you’re highlighting. Use the Doodler to annotate charts and images, sketch out a diagram or show someone how to solve a tricky math problem just as if you were with them in person. However, they can play it back as often as they need to in VoiceThread.

View the short overview video about the Doodler tool in VoiceThread below and access VoiceThread’s documentation for more information.

Ignite: An Innovative Approach to Presentations

ignitelogoThis summer, I was lucky enough to attend ASCD’s Leader to Leader (L2L) event on behalf of the Massachusetts affiliate of ASCD.  The purpose of the conference is to bring together affiliate leaders and members, building capacity and fostering collaboration.  During this event, ASCD staff and affiliate leaders shared Ignite sessions, which are, by definition, five-minute presentations that are comprised of 20 slides, each displayed for exactly 15 seconds. The slides move forward automatically, despite the presenter’s readiness, which creates a very quick, engaging, and dynamic atmosphere.  The slides often display visuals, as opposed to traditional text-based presentations.  The Ignite structure forces presenters to be succinct and clear, in addition to necessitating movement, energy, and preparedness. If you are interested in learning more, check out the history of Ignite events via Wikipedia or some additional information about what Ignite talks entail.

I also wanted to share with you the Ignite session presented by Massachusetts ASCD affiliate leader and alum of Lesley University’s Educational Technology Master’s program, Suzy Brooks. Suzy is a third grade teacher, in addition to serving as an EdTechTeacher consulting instructor.  Suzy created and shared an inspiring blog post about the experience of creating and sharing an Ignite session, describing each stage of the difficult and quite rewarding process.  Ignite talks can be an exciting vehicle to kick-off and set the tone for a class, meeting, or conference.

Advice for Your First Web Conference

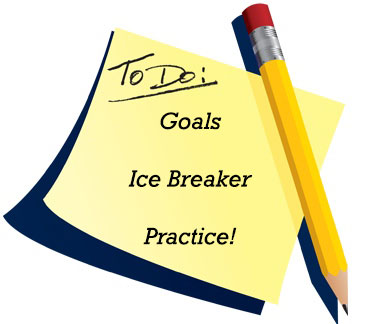
to_do
Advice for your first web conference
The first time your class meets virtually can be daunting. If you’re not practiced at web conferencing, it may feel awkward and foreign. You probably felt pretty nervous the first time you walked in front of a classroom of students, too. Here are a few tips to turn you into a web conferencing pro:

Create a sketch of the session
List your main goals and how you hope to accomplish them. Create an outline or “storyboard” of your session. Consider what features of the web conferencing software you will use and make note of any additional resources you will need such as links to websites, images, etc.

Keep it simple
Don’t try to use everything. You don’t need to use every tool in the software. Pick a few key ones and then focus on the content and communication. You don’t want your meeting to be about the tool. Don’t try to do too much in one session. If it’s your first online class meeting, your students may need to adjust to a different way of interacting. Keep your main goal in mind.

Include interaction
You may not be in the same room with your participants, but you can still interact with them. Consider including an icebreaker activity at the beginning of the session. If the group is small, give everyone a chance to introduce themselves. Ask them questions. If there’s a polling tool or emoticons, use it to get quick feedback. Avoid too much text and use graphics that work with your content.

Managing participation
Plan in advance how you will manage questions or comments from participants. Is there a “Raise Hand“ to request the microphone or get your attention? Will they type in the chat window? Send you a private chat message? Let participants know how they are expected to participate at the outset of the session. Being clear will help ease any confusion.

Practice, Practice, Practice
Do a dry run of your session using all the tools you will use in the real session. Treat it like a dress rehearsal. Invite a friend or colleague to be your “student.” The more comfortable you are with the virtual space and its tools, the less you have to think about them. This allows you to focus on your students and the presentation material.

Self-evaluate
Do a little self-reflection after the session. What worked? What didn’t? Why? What might you want to do differently next time? It’s easy to skip this important step, but don’t. Review while the session is still fresh in your mind.